 Since the last few Outlook versions, Outlook names your email account and mailbox folder set after your email address. This results in quite large display names which aren’t always meaningful, get truncated or clutters the Outlook interface more than it should.
For instance, when you set the delivery for multiple POP3 accounts to a single pst-file, it doesn’t make sense that the pst-file in Outlook is named after the email address of only 1 account.
Another example is when you have 2 or more accounts and want a more elegant or shorter display name like “Work” and “Private” rather than the full email address.

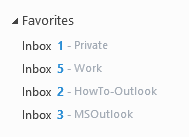
Unclutter some areas by renaming accounts and mailboxes.
Some display names can easily be changed but others, like for instance for Exchange and Outlook.com accounts, can be more challenging to change.
This guide instructs you how to change the display name of any Email Account type or Mailbox Folder set in Outlook.
- What is the difference between the account and mailbox name?
- POP3 accounts, archives and other pst-files
- IMAP accounts
- Exchange mailboxes (including Office 365 for Business and Outlook.com)
- MFCMAPI Method to change the mailbox display name
What is the difference between the account and mailbox name?
 The name of your email account is what you see when you press the Send/Receive button or on the From button when you have multiple accounts configured in Outlook.
You’ll also see it when you create a message rule with the “through the specified account” condition (for instance, to automatically move it to another folder).
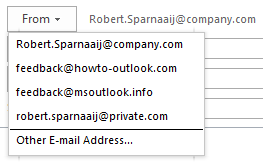
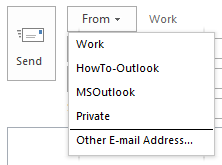
Your “From” account list is another area where you can shorten the display names.
The name of your mailbox is what you see in the Navigation Pane on the left in Outlook or when you are for instance using the Move to Folder dialog. This is also know as “the root folder of a mailbox” or “top level folder” since it is the main container of all the folders within your mailbox.
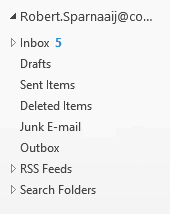
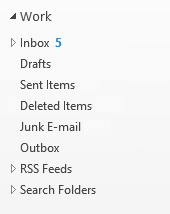
Truncated email addresses don’t look that nice in the Navigation Pane.
The name of the mailbox is also appended in the Favorites section when you have folders with the same name added there. For instance, when you have the Inbox folder of 2 different mailboxes added as a Favorite. A “before” and “after” screenshot of this Outlook section can be found at the beginning of the article.
Note:
After changing the display name of a mailbox via any of the methods below, you may need to restart Outlook for changes to take effect in the Favorites section within the Navigation Pane.
POP3 accounts, archives and other pst-files
 To change the display name of a POP3 account:
- Open the Account Settings dialog;
- Outlook 2007
Tools-> Account Settings… - Outlook 2010 / 2013 / 2016 / 2019 / Microsoft 365
File-> Account Settings…-> Account Settings…
- Outlook 2007
- Double click on your email account.
- To set the account name;
- Outlook 2007 / 2010 / 2013 / 2016 (msi)
- Press the More Settings… button.
- Type the display name for your account on the General tab.
- Outlook 2016 / 2019 / Microsoft 365
Modify the “Account name” field.
- Outlook 2007 / 2010 / 2013 / 2016 (msi)
- Press OK until all dialogs are closed and you are back in the main Outlook window.
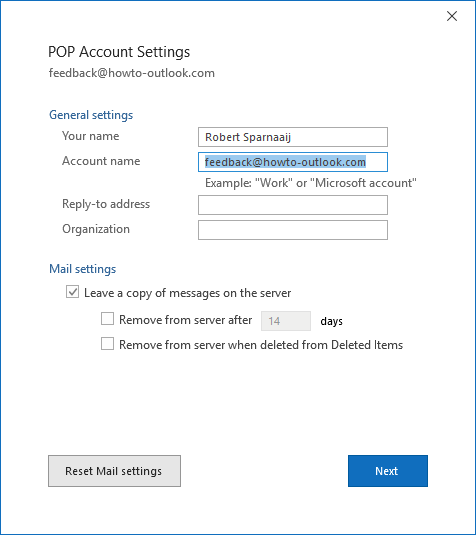
Changing the name of a POP3 account in Microsoft 365.
Changing the display name of the POP Mailbox and other pst-files
To change the display name of pst-files belonging to POP3 accounts or other archives:
- Open your Account Settings dialog;
- Outlook 2007
Tools-> Account Settings… - Outlook 2010 / 2013 / 2016 / 2019 / Microsoft 365
File-> Account Settings-> Account Settings…
- Outlook 2007
- Select the Data Files tab.
- Double click on the pst-file for which you want to change the display name.
- Change the “Name” field.
- Press OK and OK again to return to the main Outlook window.
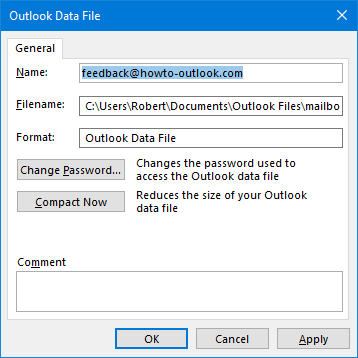
Changing the name of a POP3 or other pst-file.
IMAP accounts
 To change the display name of an IMAP account:
- Open the Account Settings dialog:
- Outlook 2007
Tools-> Account Settings… - Outlook 2010 / 2013 / 2016 / 2019 / Microsoft 365
File-> Account Settings…-> Account Settings…
- Outlook 2007
- Double click on your email account.
- To set the account name;
- Outlook 2007 / 2010 / 2013 / 2016 (msi)
- Press the More Settings… button.
- Type the display name for your account on the General tab.
- Outlook 2016 / 2019 / Microsoft 365
Modify the “Account name” field.
- Outlook 2007 / 2010 / 2013 / 2016 (msi)
- Press OK until all dialogs are closed and you are back in the main Outlook window.
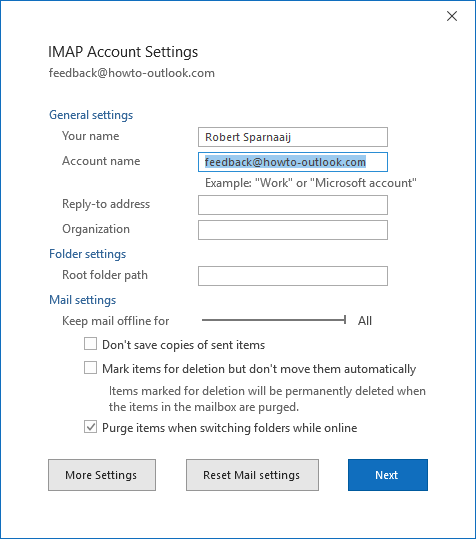
Changing the name of an IMAP account in Microsoft 365.
Changing the display name of the IMAP Mailbox
When you change the display name of an IMAP account in Outlook 2013, 2016, 2019, or Microsoft 365, the name of the mailbox will automatically change as well. If you want this display name to be different from the account name, use the MFCMAPI method.
For Outlook 2007 and Outlook 2010, changing the display name of the IMAP mailbox is the same as for any other pst-file:
- Open your Account Settings dialog;
- Outlook 2007
Tools-> Account Settings… - Outlook 2010
File-> Account Settings-> Account Settings…
- Outlook 2007
- Select the Data Files tab.
- Double click on the pst-file for which you want to change the display name.
- Change the “Name” field.
- Press OK and OK again to return to the main Outlook window.
Exchange mailboxes (including Microsoft 365 for Business and Outlook.com)
 To change the display name of an Exchange account:
- Open the Account Settings dialog:
- Outlook 2007
Tools-> Account Settings… - Outlook 2010 / 2013 / 2016 (msi)
File-> Account Settings…-> Account Settings… - Outlook 2016 / 2019 / Office 365
This is no longer possible. See the “Update” note in the next section for more info.
- Outlook 2007
- Double click on your email account.
- Press the More Settings… button.
- Type the display name for your account on the General tab.
If this field is grayed out, you’ll need to use the MFCMAPI method. - Press OK until all dialogs are closed and you are back in the main Outlook window.
Changing the display name of an Exchange mailbox can only be achieved via MFCMAPI.
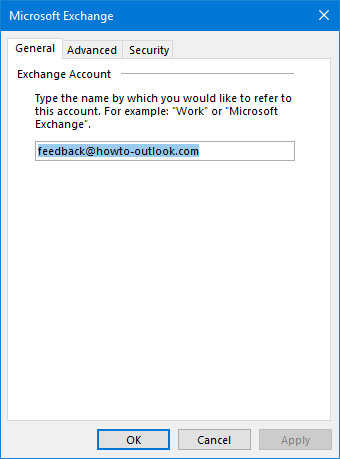
Changing the name of an Exchange account in Outlook 2013.
MFCMAPI Method to change the mailbox display name
 As mentioned, the display name of an Exchange mailbox can’t be changed directly within Outlook. Also, the display name of an IMAP mailbox in Outlook 2013, 2016, 2019 and Microsoft 365 can’t be set separately from the display name of the account.
By using MFCMAPI however, this task becomes quite easy.
Update! As of Outlook 2016, Office 2019 and Microsoft 365 Build 1806, the MFCMAPI method is no longer persistent and eventually your custom display name will be overwritten again with your primary SMTP address.
If you’d like to see improvements made to the way Outlook displays mailbox names, then you can provide feedback or suggest a feature directly from within Outlook via;
- File-> Feedback
- Download MFCMAPI from its official project page on GitHub.
- When you use a 32-bit version of Outlook, you’ll need the file starting with;
MFCMAPI.exe - When you use a 64-bit version of Outlook, you’ll need the file starting with;
MFCMAPI.exe.x64
- When you use a 32-bit version of Outlook, you’ll need the file starting with;
- Extract the downloaded zip-file and execute
mfcmapi.exe. - Accept any dialog prompts to get to the main window of MFCMAPI.
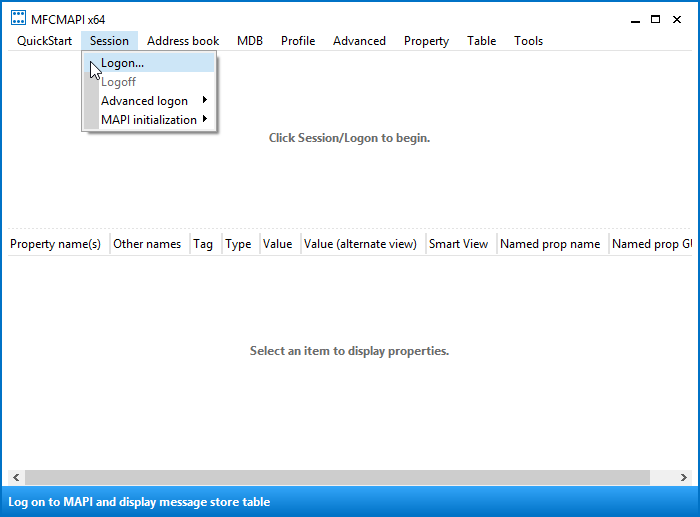
Choose: Session-> Logon…
Select the mail profile for which you want to change a mailbox’s display name.
If you are unfamiliar with this dialog, simply press OK.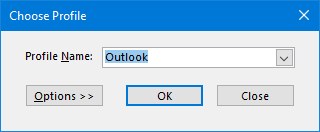
- In the top-part of MFCMAPI you should now see all your configured mailboxes and connected pst-files. Select the mailbox that you want to change the display name for.
In the bottom part of MFCMAPI, you’ll now see various properties of your mailbox. Don’t let yourself be overwhelmed by this but look for the line PR_DISPLAY_NAME and double click on it.
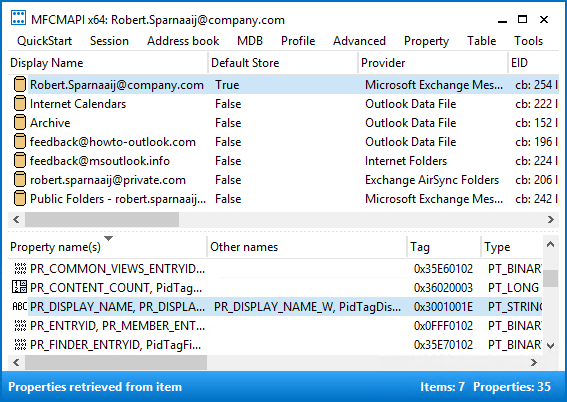
The Property Editor will open. In the “Ansi” field, you can now modify the display name of your mailbox.
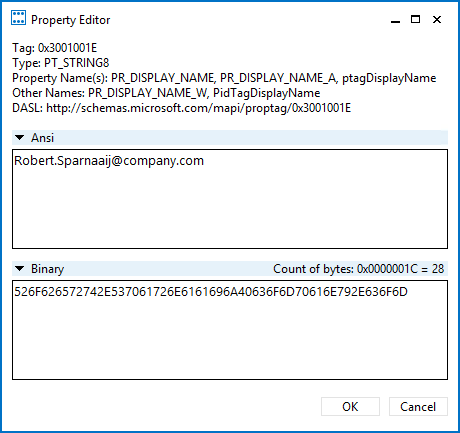
- Press OK to confirm the change and to return to the main MFCMAPI window.
- Close MFCMAPI.
When you now start Outlook again, the mailbox will show the new name you have given it.


