 The Inbox Repair Tool is your first-aid-kit when it comes down to corruptions in your Outlook’s data storage file (pst-file).
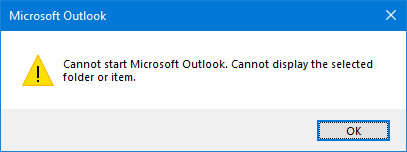
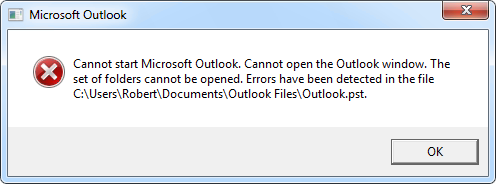
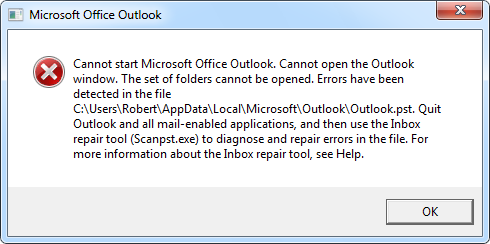
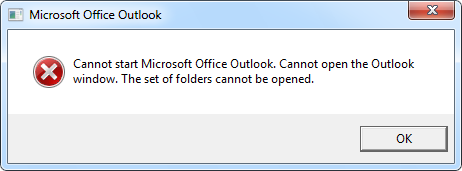
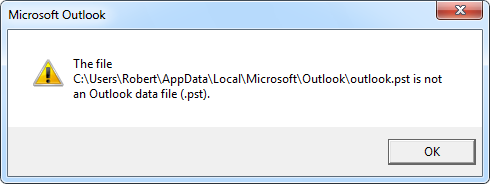
A common need for running this tool is when Outlook refuses to load or is not willing to open a pst-file and displays an error similar to;

Additional often seen variants are;
Cannot start Microsoft Outlook. Cannot open the Outlook window. The set of folders cannot be opened. Errors have been detected in the file <path to pst-file>.
Errors have been detected in the file <path to pst-file>.
The file <path to pst-file> is not an Outlook data file (.pst).
In other cases, you might get recommended to use this tool when you are suffering from some specific symptoms such as (but not limited to), Outlook crashing upon displaying a folder or writing data to it, mspst.dll errors in the Event Viewer, import/export not completing, several send/receive errors or view settings not being maintained.
This guide helps you locate the Inbox Repair Tool for your version of Outlook, walks you through the repair process and gives recommendations what to do to when the Inbox Repair Tool fails and how to prevent pst-file corruptions from happening in the future.
- Locating scanpst.exe for your Outlook version
- Running the repair process
- Repair process failed
- Getting repair prompts even after successful repair
- Other issues with pst-files
- Prevent pst-file corruptions
- Additional screenshots of error messages
Locating scanpst.exe for your Outlook version
 The location of scanpst.exe depends on your version of Outlook and whether or not you are using a 64-bit version of Windows.
Microsoft 365 / Outlook 2019 / Outlook 2016 Click to Run
any Windows; C:\Program Files\Microsoft Office\root\office16\
Outlook 2016 (MSI-based Volume License installation)
32-bit Windows; C:\Program Files\Microsoft Office\Office16\
64-bit Windows; C:\Program Files (x86)\Microsoft Office\Office16\
64-bit Outlook; C:\Program Files\Microsoft Office\Office16\
Outlook 2013
32-bit Windows; C:\Program Files\Microsoft Office\Office15\
64-bit Windows; C:\Program Files (x86)\Microsoft Office\Office15\
64-bit Outlook; C:\Program Files\Microsoft Office\Office15\
Outlook 2013 Click to Run
any Windows; C:\Program Files\Microsoft Office\root\office15\
Outlook 2010
32-bit Windows; C:\Program Files\Microsoft Office\Office14\
64-bit Windows; C:\Program Files (x86)\Microsoft Office\Office14\
64-bit Outlook; C:\Program Files\Microsoft Office\Office14\
Outlook 2007
32-bit Windows; C:\Program Files\Microsoft Office\Office12\
64-bit Windows; C:\Program Files (x86)\Microsoft Office\Office12\
Outlook 2010 – Click-to-Run
When you use a Click-to-Run version of Outlook 2010, then you will not be able to open scanpst.exe via conventional means. Instead, use the procedure as described in; Inbox Repair Tool and Outlook 2010 Click-to-Run.
Running the repair process
 The repair process consists out of several steps. If you already know the location of the pst-file that you would like to scan, continue to; Starting the scanning process.
Step 1: Locating the pst-file
When you start the Inbox Repair Tool (scanpst.exe), the first thing it prompts you for is the location of the pst-file to scan. This path is revealed in the startup error or otherwise the default locations are as follows;
- Outlook 2007 and previous
C:\Users\%username%\AppData\Local\Microsoft\Outlook\ - Outlook 2010, Outlook 2013, Outlook 2016, Outlook 2019 and Microsoft 365
C:\Users\%username%\Documents\Outlook Files\
Another way to determine the location of your pst-file (in case it differs from the default location) is via the Mail applet in Control Panel-> button Data Files…
If you have multiple profiles and the pst-file to scan is not part of your default mail profile, press the Show Profiles… button in the Mail applet to select the correct profile first and then Properties…
Note:
The “AppData” folder is a hidden folder. To access these folders, you can type the path in the Address Bar or File Name field of the Explorer dialog that opens when pressing Browse…

The Inbox Repair Tool (scanpst.exe) with a file selected to scan.
Step 2: Starting the scanning process
After you have selected the pst-file to scan, you can press the Start button. At this point, nothing will happen to your pst-file yet; scanpst will do an analysis first. This analysis consists out of 8 phases of which some can take quite a bit longer to complete than others depending on the size and level of corruption of the file.

Analysis in progress…
After the analysis scan has completed, it will present you with a scanning report and options for the next step. You can press the Details… button for more information about the type of corruption.
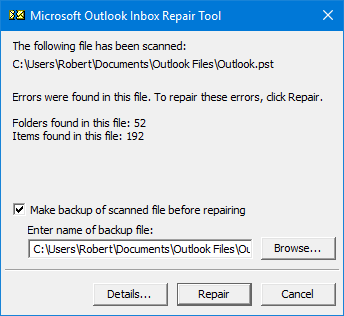
Errors were found but you are almost ready to repair them.
Step 3: Starting the repair process
Before you continue to the actual repair process, make sure you have a backup of the pst-file. If you do not have a backup already, make sure that you have the option set to make a backup before proceeding (selected by default).
After pressing the Repair button, the actual repair process will start and go through the 8 phases again. With a very large pst-file (larger than 4GB) and a slower hard disk, this process can sometimes take longer than half an hour.
Note:
When the repair process starts, it could appear that it will hang directly (Not Responding in Title Bar). In reality, it is not hanging but making a copy of your pst-file in the background or already has started the repair process. Depending on the size of your pst-file and the speed of your hard disk, this can take a while.

If it still hangs after 10 minutes (no hard disk activity either) and still hasn’t begun the actual repair process, you might want to abort the scanpst.exe process via Task manager (CTRL+SHIFT+ESC –> select tab Processes). Then, make a copy of your pst-file manually and restart the Repair process but this time with the Backup option disabled. If it still fails then, continue to the Repair process failed section.
Step 4: Repair completed
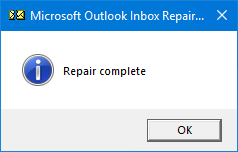
If everything goes correctly, you’ll get the “Repair complete” dialog after some time. You can then press OK to close it and start Outlook again.
If everything works now; you’re done but you might want to read the Prevent pst-file corruptions section anyway ;).
Repair process failed
 If the repair process fails, try running it again. If it fails repeatedly, but you can still access the file in Outlook, you can create a new pst-file in Outlook and copy over its contents. For step-by-step instructions see; Scanpst.exe keeps finding issues.
If you can no longer access the pst-file in Outlook and the pst-file is beyond repair for the Inbox Repair Tool, you’ll have to restore it from backup or use a 3rd party recovery tool. An exception can exist if you are using an ANSI formatted pst-file and the file is around 1.8GB in size.
Tool Tips!
Popular data recovery tools for Outlook are;
- DataNumen Outlook Repair (discount code: DNC-PUXB-HT )
- Cimaware OutlookFIX
- Stellar Repair for Outlook
- Kernel for Outlook PST Repair
Use their trial versions first to determine if they can recover more data from your pst-file than scanpst.exe.
Getting repair prompts even after successful repair
 When you still get repair prompts after a successful repair, then it could be that the “PromptRepair” Registry key didn’t get deleted after the repair.
In that case, you can remove it manually and check whether Outlook will run correctly again.
- Open the Registry Editor.
- Go to;
HKEY_CURRENT_USER\Software\Microsoft\Office\<version>\Outlook\PST - Delete the following keys;
LastCorruptStorePromptRepair
- Start Outlook
Other issues with pst-files
 There can be several other issues with pst-files which you can run into. The most common are posted below together with their solution.
Repairing a pst-file around 1.8GB in size
If your pst-file is around 1.8GB in size and Outlook refuses to open it or to write to it then it is quite likely that you are using an ANSI formatted pst-file. This file format was the default (and only) file format in in Outlook 2002/XP and previous and has a file size limit of around 1.8GB.
While the new pst-file format (Unicode) in Outlook 2003 and later versions of Outlook no longer have this limit, the limit still exists if you are using an older pst-file.
If you can still open the pst-file in Outlook, then it is recommended to copy the contents to a new Unicode pst-file.
If you can no longer open the file in Outlook, then you must use the pst2gb tool to truncate the pst-file first.
More info:
Am I in ANSI or UNICODE format?
Migrate from ANSI to Unicode
PST2GB: Oversized PST and OST crop tool
CRC errors
When you get CRC errors upon trying to copy the pst-file in Explorer or open it in Outlook, you usually have a failing hard disk which should be dealt with immediately. For instructions see; CRC (Cyclic Redundancy Check) errors on pst-file.
Pst-file in use
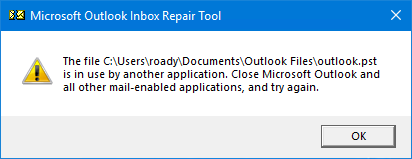
When you get a pst-file in use error, it means that Outlook is still running or another application which integrates itself with Outlook or depends on the outlook.exe process is still running. A quick fix might be to simply restart your computer. To troubleshoot this issue further see; Outlook doesn’t close.
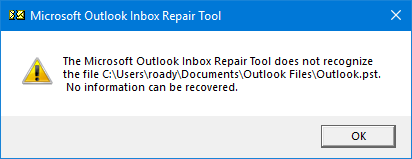
Inbox Repair Tool does not recognize the file
In this case you have either selected a file which isn’t a pst-file or a file that is too badly damaged for scanpst.exe to repair. In case of the last, you can try a 3rd party recovery tool. However, if the file is smaller than 265KB then it means that the file is empty and nothing is in there to recover.
Lost and Found folder
The Lost and Found folder is created during a repair when items have been found for which it was impossible to determine their original folder or when the folder structure within the pst-file got lost completely.
When such a corruption in a pst-file exists, it is highly recommended to start with a new pst-file and copy over the recovered contents to that pst-file. This process is similar as in; Scanpst.exe keeps finding issues.
Prevent pst-file corruptions
 Preventing is better than repairing of course. While there have been a lot of precautions built into Outlook to prevent pst-file corruptions, there are a couple of common causes which may result in corruptions in the pst-file;
- Computer/Outlook crashes
If your computer crashes while Outlook was running or even worse, writing data to your pst-file, running scanpst.exe afterwards is highly recommended. Always try to find the root cause of your computer crashes and make frequent backups of your pst-file when you cannot directly find the cause (actually, making backups frequently is always recommended). - Outlook not closing properly
If Outlook doesn’t close properly (the outlook.exe process continues to run after you close Outlook), then Outlook will be closed forcefully when shutting down your PC which is similar to Outlook crashing. To troubleshoot see; Outlook doesn’t close or outlook.exe process keeps running. - Faulty add-ins which write corrupted data
While add-ins are great to extend the functionality of Outlook, they might not all work as expected. If corruptions continue to occur in your pst-file, it might be good to review your installed add-ins and see if you still need them or if an update is available. You might be even using some without knowing. Disable them all and see if the corruptions return. If not, test them one-by-one to find the culprit. For more info see; Enable/Disable add-ins. - Storing your pst-file on a network share
Pst-files are designed to work from a local hard drive. Using pst-files from a network share is not supported by Microsoft and could lead to poor performance, data corruption or even data loss.
If your My Documents folder is redirected to a network share, you might be using your pst-file from a network share without realizing it. - Storing your pst-file in Cloud Storage locations like OneDrive and DropBox
Connecting to pst-file which are within your OneDrive or Dropbox folder or any other Cloud Storage provider isn’t supported either. This results in synching conflicts as Outlook has a lock on pst-files so OneDrive can’t complete the sync. When you want your data to sync to the Cloud, store them within an Outlook.com mailbox (free).For more info see: Synching pst-files via OneDrive or Dropbox
and: Archiving emails to OneDrive or other Cloud storage.
Additional screenshots of error messages
Below you’ll find several screenshots of errors which Outlook might display when there is an issue with your pst-file.

